How to Move SQL Server Database to Azure SQL – Best Solution
There are multiple options available to transfer SQL Server database to Azure . Nowadays, you can move database and log files and even the entire database with the help of latest technology. Moreover, users can transfer the data to an Azure SQL database or a VM running SQL database server. The approach that can be used to move SQL server database to Azure will be based on the tools which are used presently, the experience with SQL server and the requirements of SQL after the database is present in Azure. In the write-up, multiple approaches have been explained in a step-wise manner, but we will explain the easiest method in detail. Additionally, if you are using SQL server 2014, there are extra options available for users.
Options to Transfer SQL Server Database to Azure SQL Database
Before knowing the best technique to move SQL Server database to Azure, it is recommended to consider the fact which functionalities are used in SQL server and what are the requirements.
There are various methods to perform migration of SQL Server database to Azure. You can choose any of them according to your ease. Options to transfer SQL Server database to Azure are stated as below:
- Migrate using DMA
- Moving database to a SQL database by generating script of an already existing database.
- By data-tier application Export and Import.
- Transfer SQL Server database to Azure by SQL database migration wizard
- Move data to Azure SQL database using BCP.exe
- Using SQL Server Integration Services
These are the list of options one have to transfer SQL Server database to Azure.
Among these solutions, we will discuss the easy technique to move SQL Server database to Azure SQL database by using DAC Import/Export.
Move SQL Server Database to Azure SQL – Workaround
User can perform Data-Tier Application (DAC) export to move SQL Server database to Azure. The explanation of objects in a database and the data from user tables are moved into a DAC export file, named as BACPAC. This BACPAC file can then be copied into Azure blob storage space. In the next step, the DAC file should be imported into a new database, which comprises of all the data and objects.
Steps you Need to know Before Preceeding:
- Before start working with Import/Export Service, create an account of Azure storage for saving BACPAC files.
- This storage account will be used as a container for BACPAC files
- Export operation performs an individual batch copy of the data from a single table present in the database. So, this does not guarantee the transaction consistency of the data. In order to get transactionally consistently copy of database, use the Azure SQL database copy feature. Afterward and perform the export of the copy.
Import Database into Azure SQL Database – Steps
Users have to follow these set of instructions to import SQL Server database to Azure SQL :
- Sign in to the Azure Platform Management Portal
- Hit on New >> Data Services >> SQL Database and then, Import. Doing this will open up the Import Database dialog-window
- Go to the .bacpac file which you want to import. Hit on Storage account, then Container followed by BACPAC. Then, hit on Open
- Give a name to new SQL database. This name should be unique on the Server.
- Mention Subscription, Edition, Host Server details, and the maximum size. To continue, hit on Arrow which is present at the bottom of the dialog window.
- Mention the login details of the host server.
- In order to commence the import procedure, click on the Check Mark present at the bottom of the page. The portal will show the status information.
- Hit on SQL database present in the navigation pane to view your new database. Refresh the page.
Export Database from Azure SQL Database
Follow these steps to export SQL server database to SQL Azure:
- Sign in to the Azure Platform Management Portal
- From the navigation pane, hit on the SQL database. Click on the database which you like to export in the list shown.
- On the taskbar, click on Export to launch Export Database dialog window
- Validate that the name of the database, destination Container, Blog Storage Account and information regarding host server is correct. Then, provide the login details of the server. To continue with the procedure, hit on Check-mark at the bottom of the page.
- Make sure that the server account should compulsorily be a server-level principal login, which is created by the provisioning procedure, or any member of the dbmanager database role
- A message will prompt on the screen saying that the export request is successful. Once the export operation is complete, the BACPAC file can be imported into the SQL database server.
Transfer SQL Server Database to Azure – Quick Solution
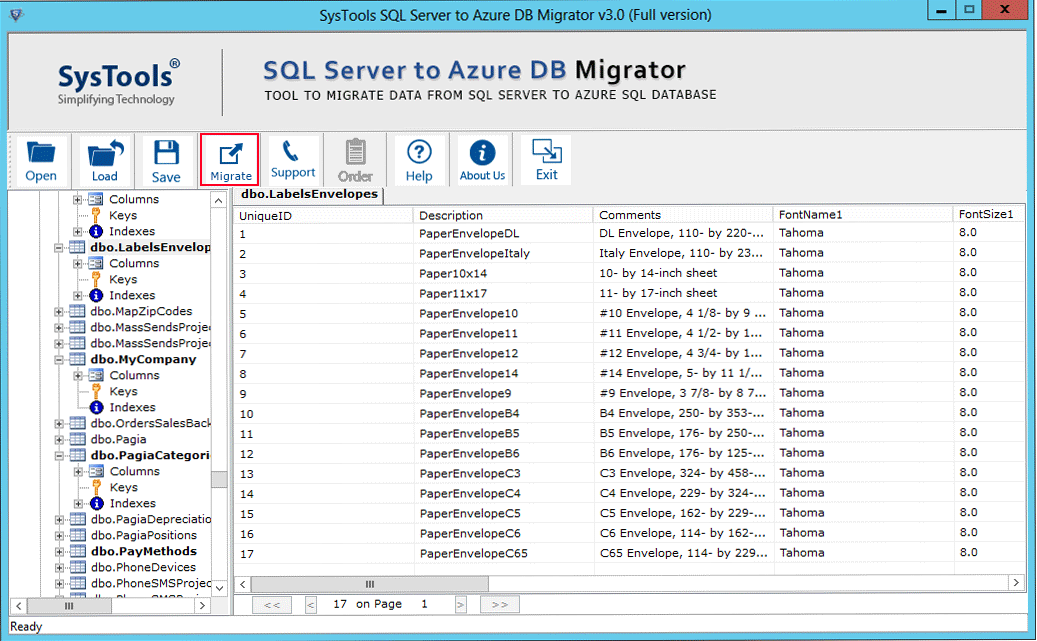
If you are looking for a quick way to move SQL Server Database to Azure then or if you dont want to perform these lengthy steps then you can go for SQL to Azure Migration Tool. The tool migrate all SQL Server database objects to Azure SQL Database withing few minutes. The tool supports to transfer SQL Server Database to Azure of SQL Version 2017, 2016 & below versions.
The Bottom Line
Oftentimes, DBA or SQL users requires to transfer SQL server database to Azure SQL. There are number of methods to transfer SQL Server database which are discussed in the above blog. The easy method has been explained in the write-up. But, this technique is quite lengthy and time-consuming. Hence, an automated solution has also been discussed to move SQL Server database to Azure database in the blog.