Modus Operandi to Import and Export SQL Server Database
The simplest way to import and export SQL Server database, is by using the Import and Export Wizard. Also, this wizard can copy the data from and to any kind of data source, which has a managed .NET Framework or an OLE DB provider. Evidently, it is a part of SQL Server Integration Services or SSIS. Moreover, users can make use of SSIS for building extraction, transformation, loading packages and for creating packages to export SQL data to MS Excel spreadsheets or a different SQL Server database.
In this blog, we will describe the process to both export and import data from and into SQL Server 2014 with the help of Import Export wizard.
Table of Content
If you are looking for a safe and automated way for SQL database Migration then, you must try SysTools SQL Migrator . Download its Free Edition to export 25 items. Supports SQL Sever 2019 and below versions.
Procedure to Export SQL Server Database to Excel
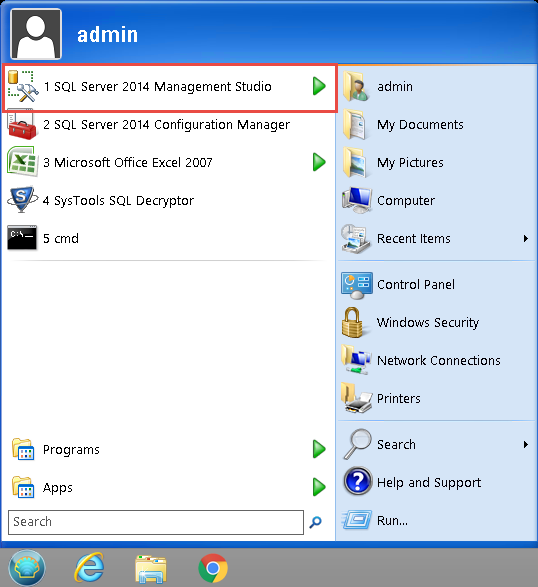
Step-1. Open SQL Server 2014 Management Studio in the system to start export database SQL server process.
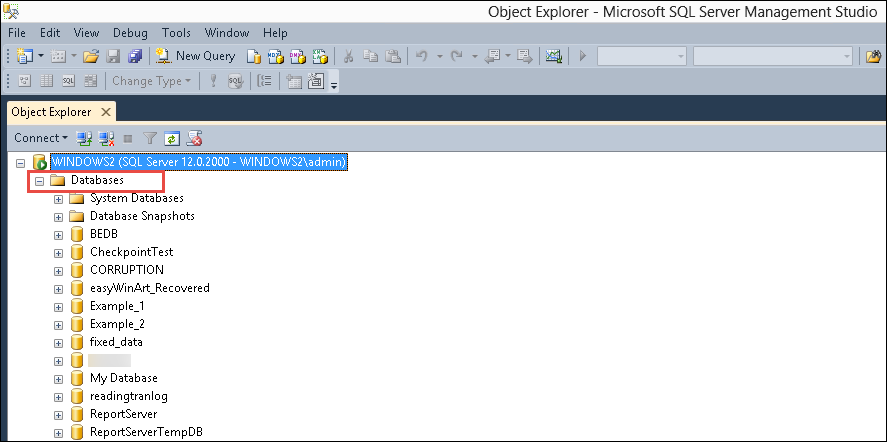
Step-2. Now, simply connect to the database engine server.
Step-3. Here, click on Databases. Moreover, expand it.
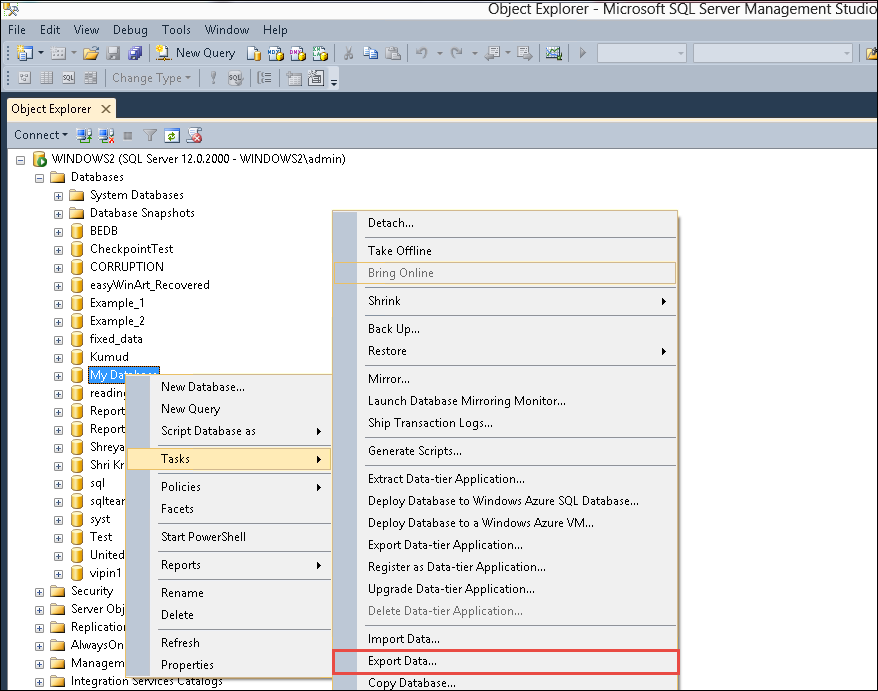
Step-5. Also, Right-click on the database that has to be exported and click on Tasks option from the drop-down menu.
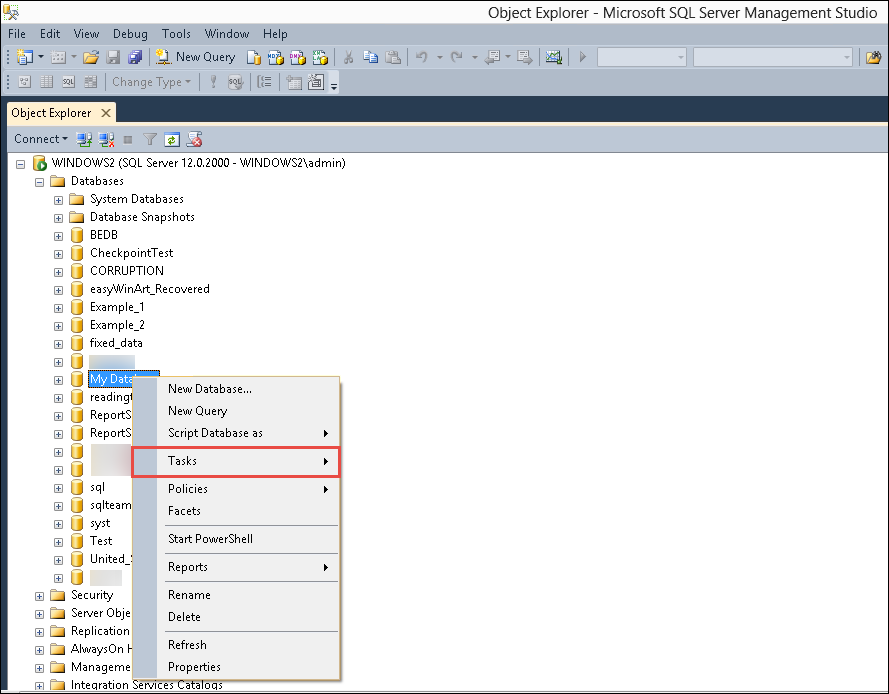
Step-6. From the menu, select the Export Data option.
Step-7. Click on Next to proceed from the Welcome screen.
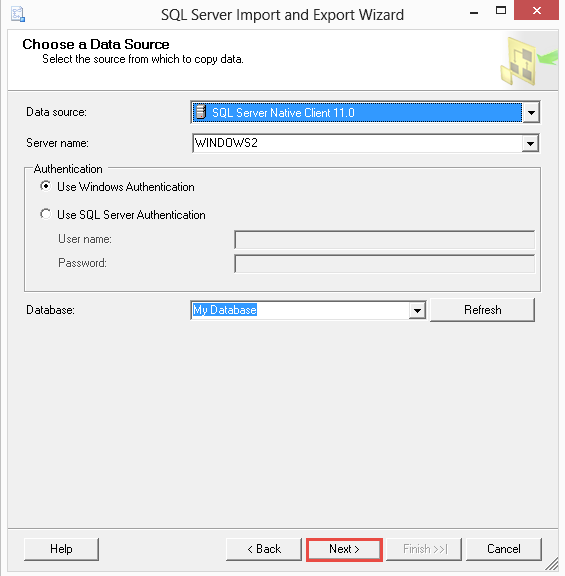
Step-8. In Choose A Data Source Window, enter the following credentials:
Data Source: SQL Server Native Client 11.0
Server Name: Enter the name of the server
Authentication: Select the appropriate authentication for the connection
Database: Choose the database, which has to be exported.
Step-9. Click on Next to proceed.
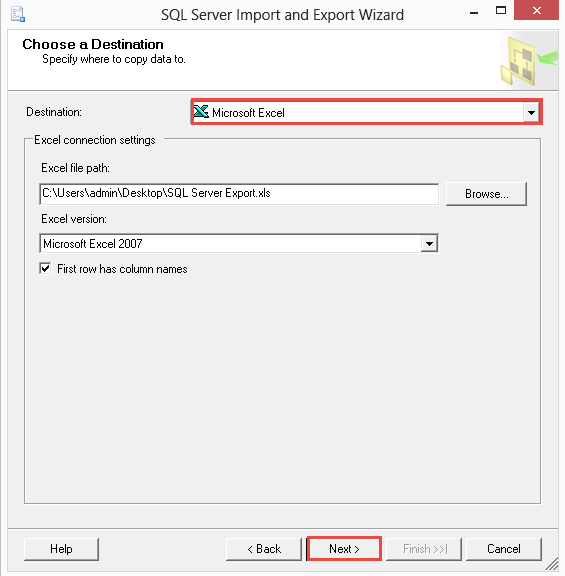
Step-10. In the Choose a Destination window enter following credentials: Destination: Select Microsoft Excel from the options.
Excel File Path: Browse the location of the Excel file in which database has to be exported.
Excel Version: Select the Excel version supported on your system.
Step-11. Click on Next to proceed.
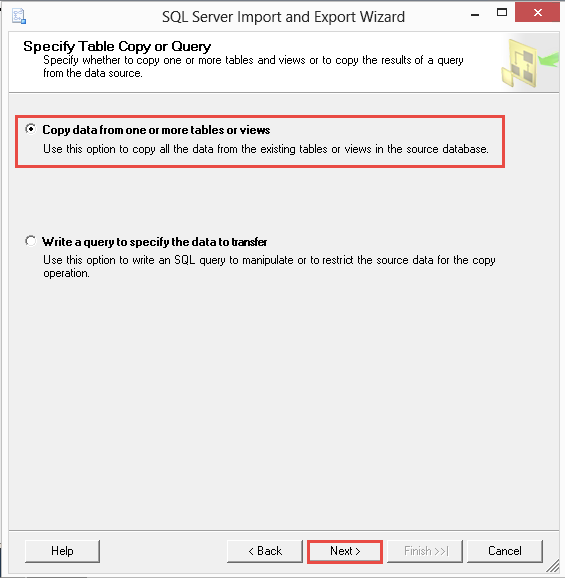
Step-12. In the Specify Table Copy or Query window, select the Copy data from one or more tables or views. Click on Next to proceed.

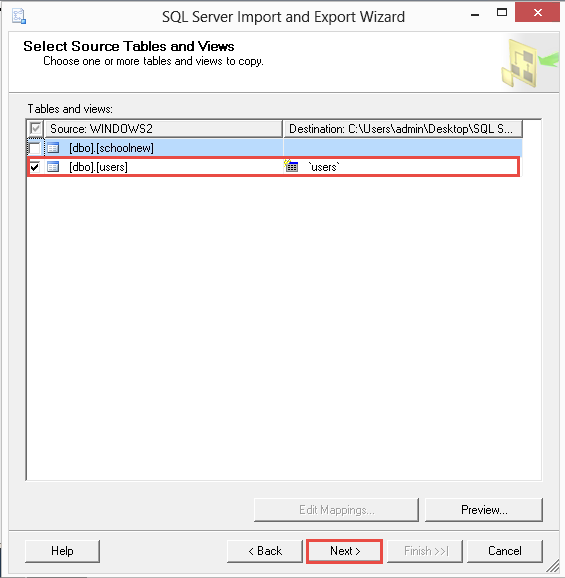
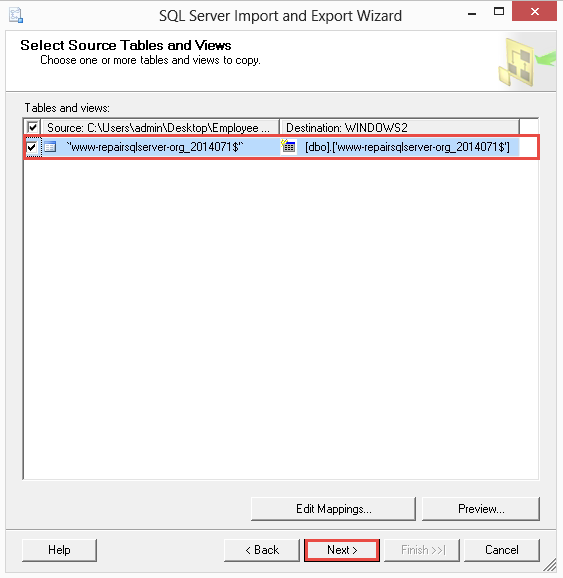
Step-13. In Select Source Tables and Views window, select the table that you want to export.
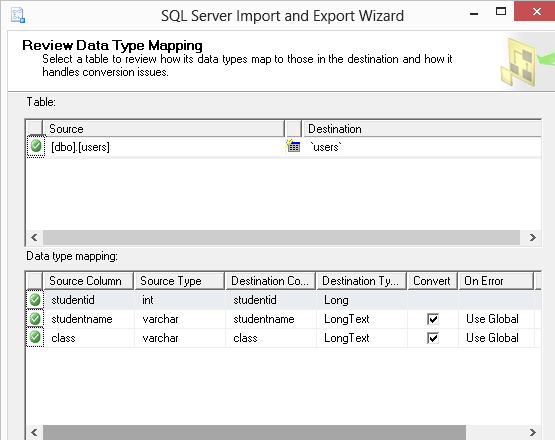
Step-14. In the Review Data Mapping window, you will see different data types mapped between the source and the destination.
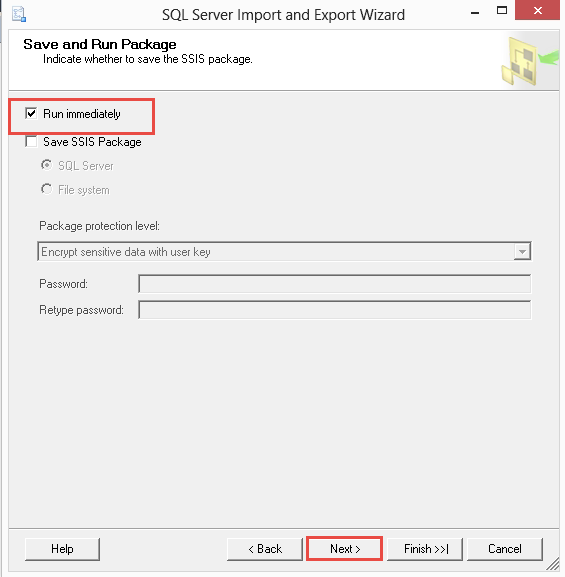
Step-15. In the Save and Run Package window, click on Run Immediately option to run the SSIS package immediately. In case, you want to save it click on Save SSIS Package option. Provide the password if required. Click on Next to proceed in this import and export SQL Server database task.
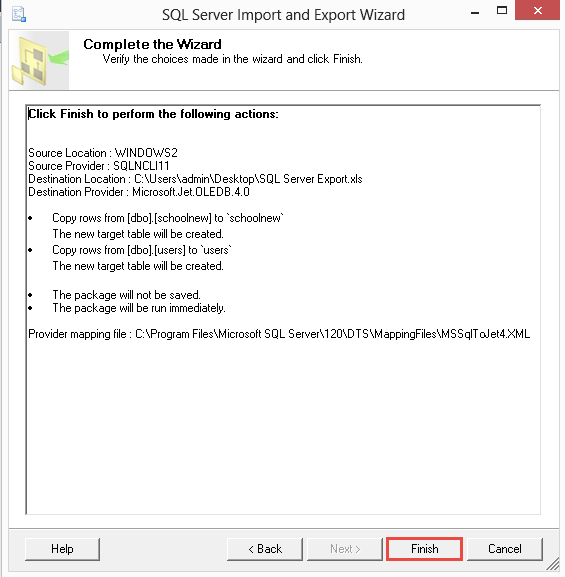
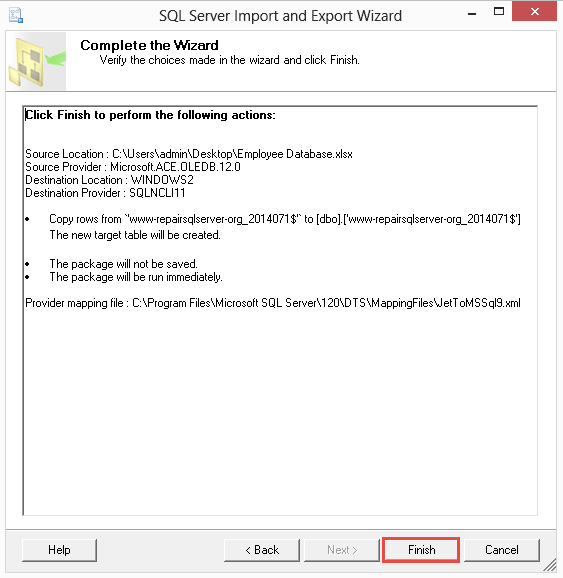
Step-16. The Complete the Wizard window gives a preview of the choices made by the user. Select Finish option to run the SSIS Package.
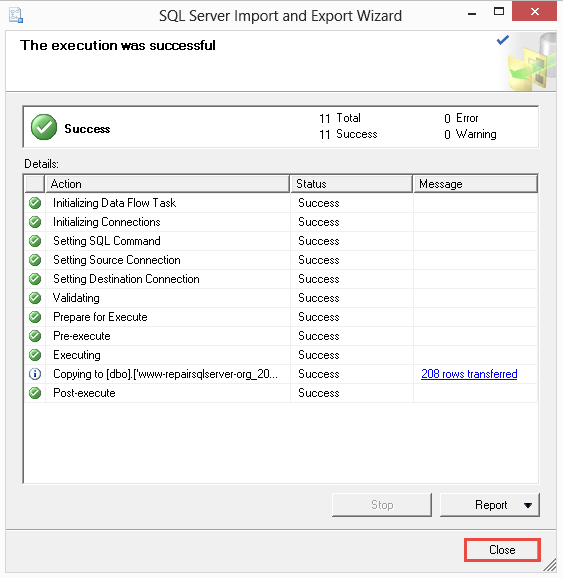
Step-18. Once successful, a complete report of the process is generated. Click on Close to end the process.
Procedure to Import Excel Spreadsheet Data into SQL Server Database
Step-1. Open SQL Server 2014 Management Studio.

Step-2. Connect to the database engine server for SQL server export database task.
Step-3. Click on Databases and expand it.

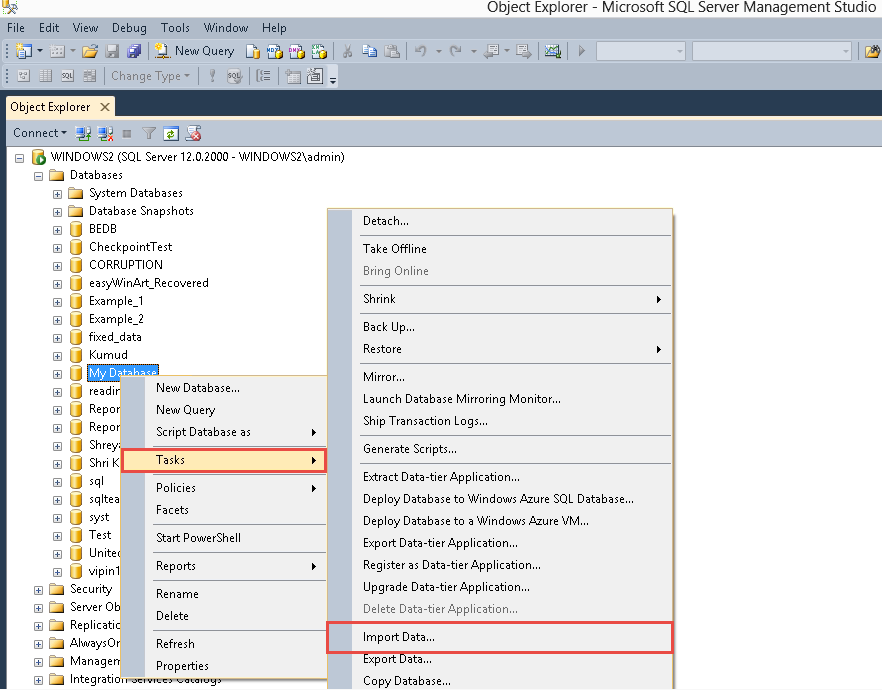
Step-4. Right click on the database that has to be exported and click on Tasks option from the drop-down menu.
Step-5. From the drop-down menu, select Import Data option.
Step-6. Click on Next to proceed from the Welcome screen.
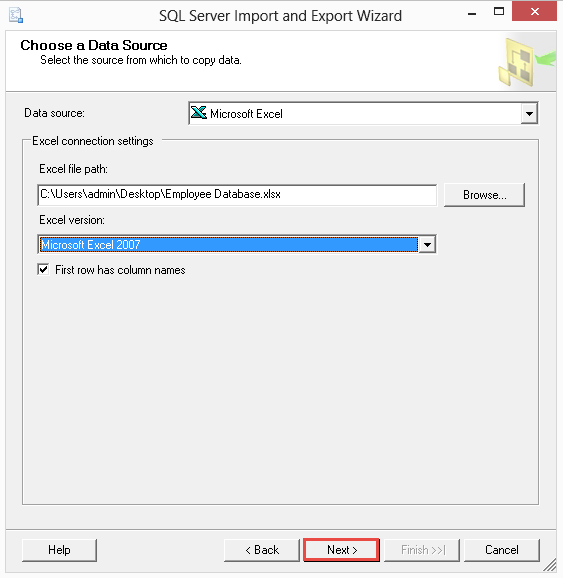
Step-7. In Choose A Data Source Window, enter the following credentials:
-
- Data Source: Enter Microsoft Excel as the database source
- Excel File Path: Browse the path of the Excel spreadsheet.
- Excel version: Select the version of MS Excel.
- Click on Next to proceed.
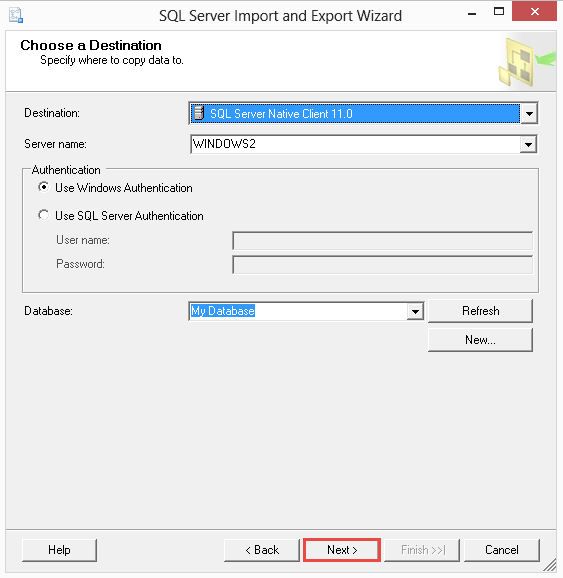
Step-8. Now, for import and export SQL Server database, In the Choose a Destination window, enter the following credentials:
Destination: Select SQL Native Client 11.0 from the drop-down menu.
Server Name: Enter the name of the destination SQL Server.
Authentication: Select the appropriate authentication for the connection
Database: Choose the database, which has to be exported.
Step-9. Click on Next to proceed.
Step-10. In the Specify Table Copy or Query window, select the Copy data from one or more tables or views. Click on Next to proceed.
Step-11. In Select Source Tables and Views window, select the table that you want to export. Also, click on Next to continue.
Step-12. Now, in the Save and Run Package window, click on Run Immediately option to run the SSIS package immediately. In case, you want to save it click on Save SSIS Package option. Also, provide the password if required. Moreover, Click on Next to proceed here.

Step-13. In addition, the Complete the Wizard window gives a preview of the choices made by the user. Finally, select Finish option to run the SSIS Package.
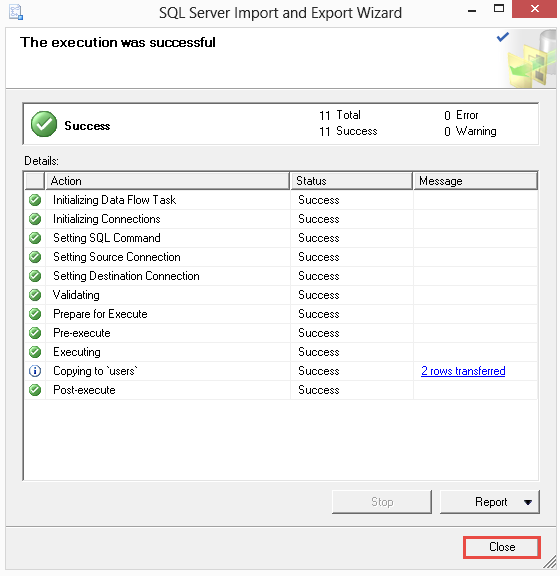
Step-14. Now, once successful, a complete report of the process is generated. Click on Close to end the process.
Also read: Know How to View MDF File Without SQL Server Installed in System
Conclusion
Finally, with the help of the above-mentioned steps, SQL Server users can easily import and export SQL Server database to the destination as per their requirements. Evidently, this task isn’t that difficult to understand if users are aware of the right method. Hence, we advise users to be calm & export SQL database very attentively.